
How Long Does It Take to Replace a Roof?
Landscaping the garden, renovating a kitchen, or refurbishing a living room – these are home improvement tasks you can visualize in terms of timelines. But, have you ever wondered about the time it might take to replace a roof? With Ireland Contracting, we’re here to demystify this for you. Dive into our comprehensive guide and discover everything you need to know about the duration and major factors that play an integral part in a roof replacement project. Familiarize yourself with elements such as project planning, workforce efficiency, material procurement, and weather cooperation. Prepare to be enlightened!
The time it takes to replace a roof can vary depending on various factors, such as the size and complexity of the roof, the materials being used, and weather conditions. A typical residential roofing replacement project can take anywhere from a few days up to a week or more to complete. It is best to consult with your roofing contractor for a more accurate estimate based on your specific situation.
Assessing the Roof Damage
Before embarking on the journey to replace a roof, it is crucial to accurately assess the extent of damage. This step allows you to determine the scope of the project and ensure that all necessary repairs are addressed during the replacement process.
One way to assess roof damage is by conducting a visual inspection from ground level. Take note of any obvious signs such as missing or damaged shingles, sagging areas, or visible leaks. However, keep in mind that not all damage can be easily seen from below.
To get a more comprehensive understanding of the condition of your roof, it is recommended to perform a thorough inspection by climbing up and examining it closely. This can be done using a ladder with proper safety precautions in place.
During the inspection, pay attention to various components of the roof , including:
- Shingles: Look for any cracked, curled, or missing shingles that might expose the underlayment or allow water penetration.
- Flashing: Inspect the flashing around chimneys, vents, and other roof protrusions for signs of damage or deterioration.
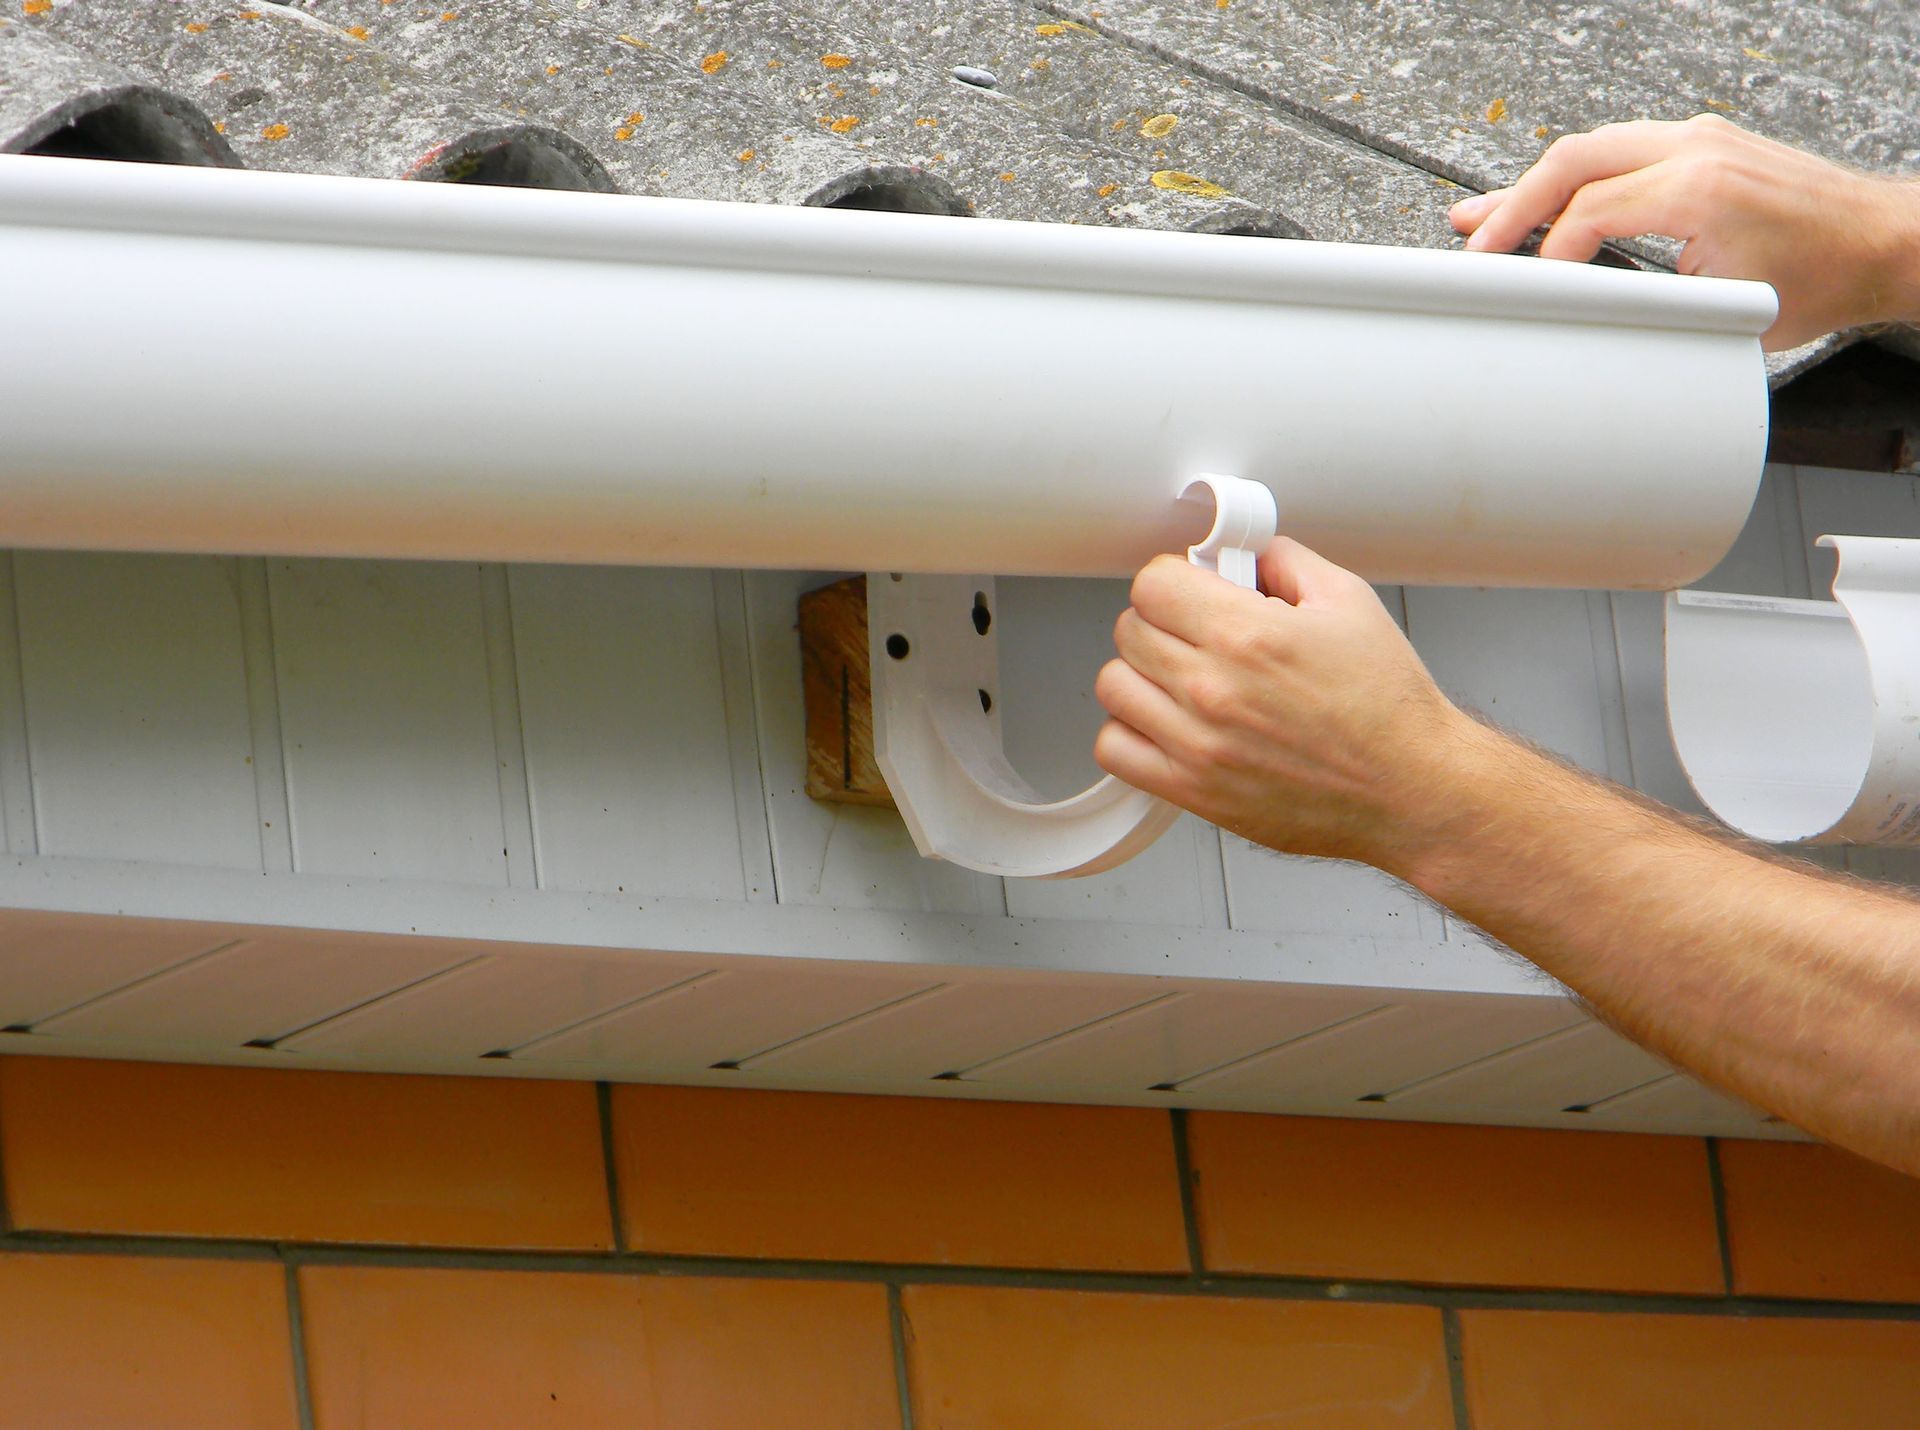
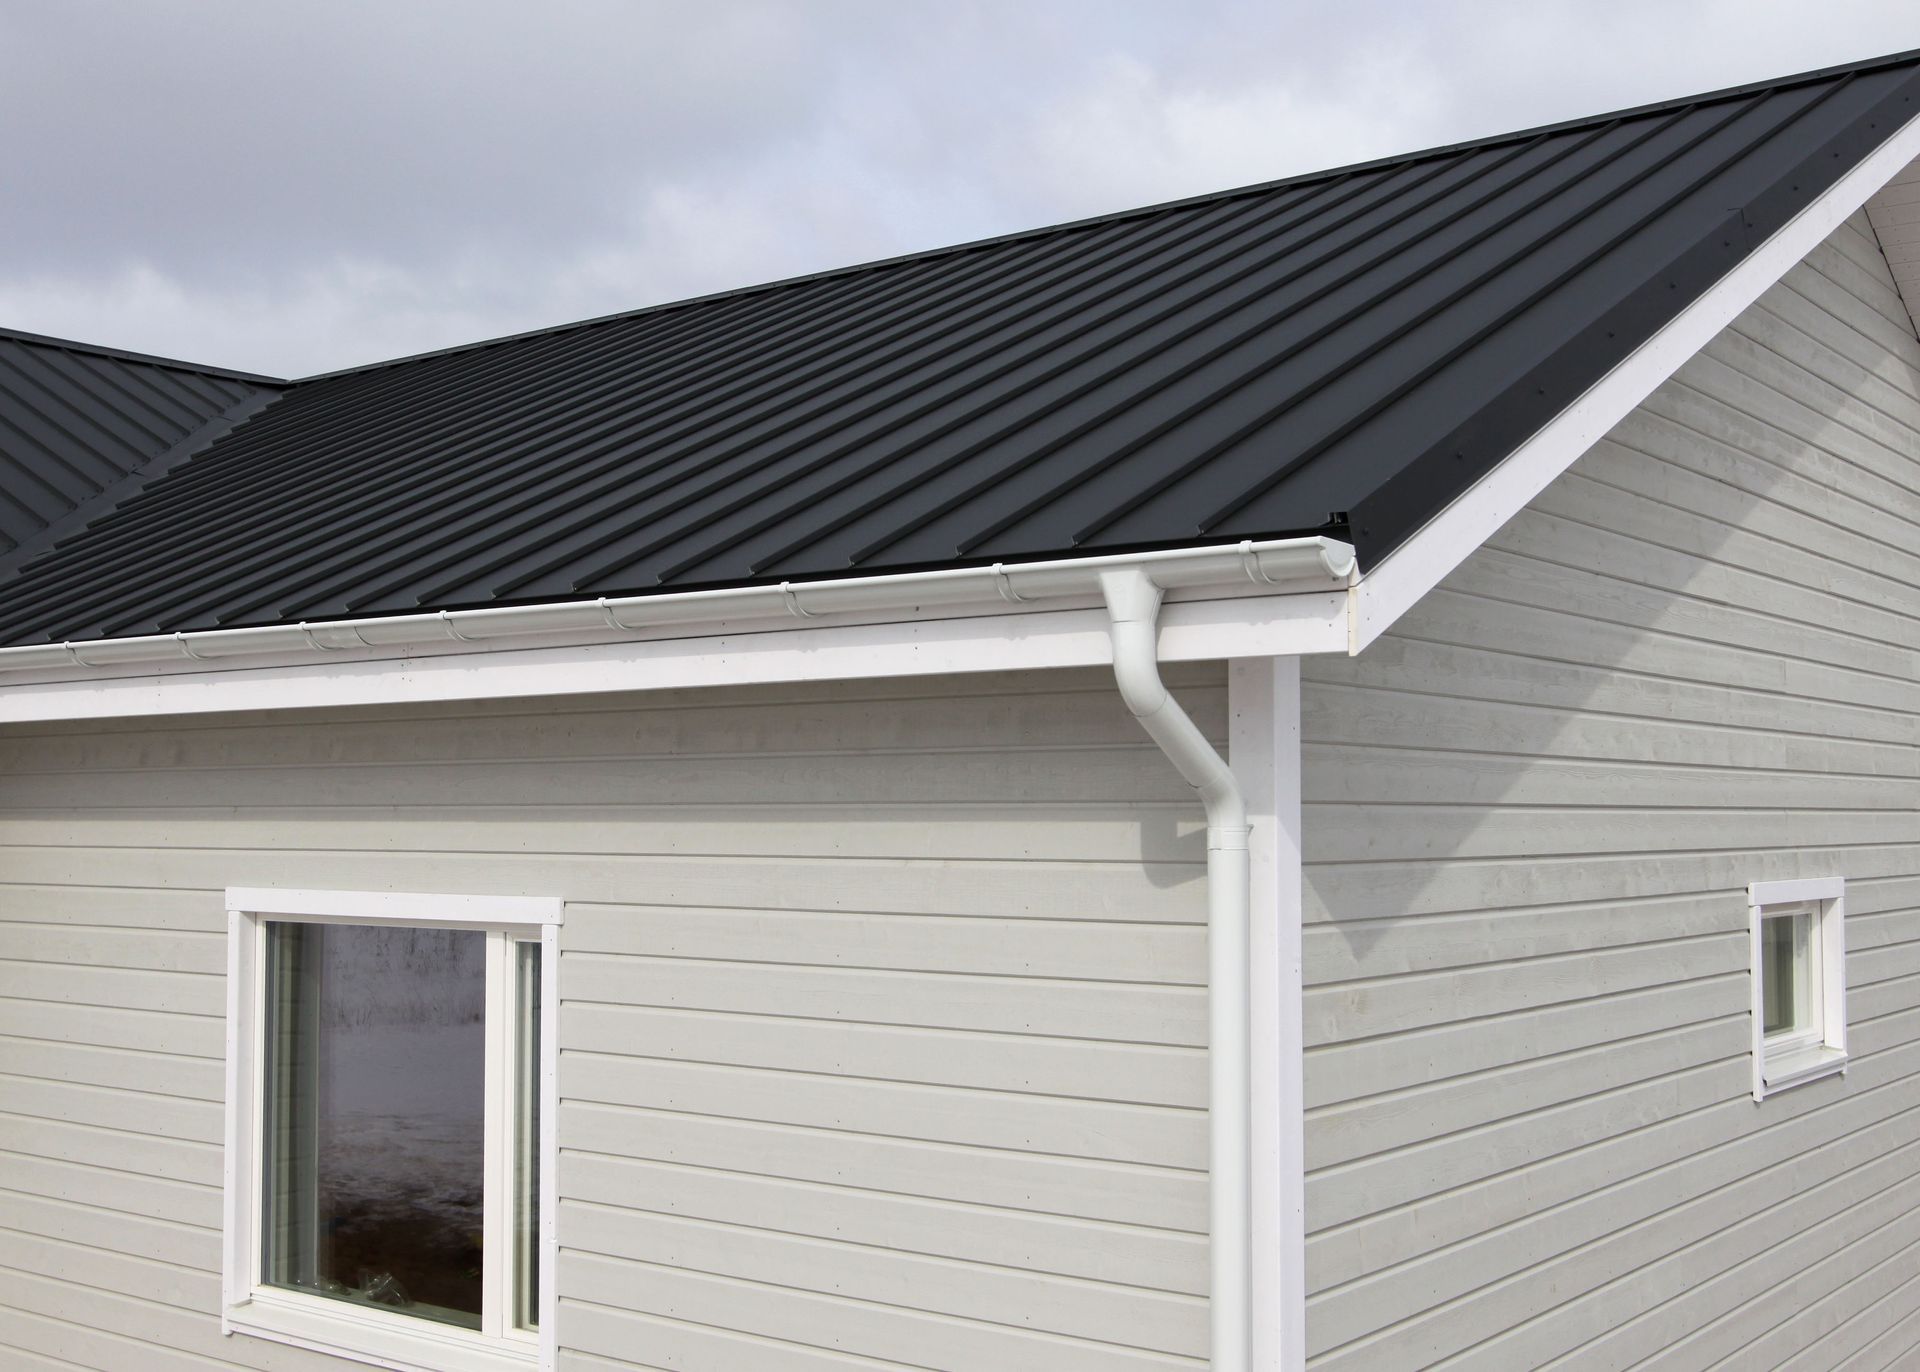
- Gutters: Check for debris buildup and ensure that gutters are properly functioning and adequately channeling water away from the roof.
- Ventilation: Assess the ventilation system to ensure proper airflow and prevent moisture buildup in the attic.
- Roof Decking: Examine the condition of the roof decking for signs of rot or structural damage.
By thoroughly assessing these aspects, you will be able to provide accurate information to contractors and have a better understanding of what needs to be addressed during the roof replacement process.
Inspection Techniques
Carrying out a comprehensive roof inspection requires a systematic approach and attention to detail. It’s important to employ effective inspection techniques that cover all essential aspects of your roof’s condition.
Start by using binoculars or a camera with zoom capability to conduct an initial evaluation from the ground. Look for any obvious signs of damage, such as missing or damaged shingles, loose flashing, or visible wear and tear.
Next, move on to a closer examination by climbing onto the roof. Ensure that you follow all necessary safety precautions and use appropriate protective gear. Begin the inspection at one corner of the roof and systematically move across its surface, inspecting each section thoroughly.
When examining the roof up close, perform the following tasks:
- Check for Loose or Damaged Shingles: Inspect each shingle for cracks, curling edges, or signs of granule loss.
- Examine Flashing and Sealants: Pay close attention to flashing around chimneys, skylights, vent pipes, and other areas where water could penetrate. Check for any cracks or gaps in sealants.
- Assess Gutters and Downspouts: Clear any debris from gutters and check for signs of damage or blockages that could prevent proper water drainage.
- Look for Water Stains or Leaks: Inside the attic space, inspect the ceiling and walls for any signs of water stains or leaks that indicate underlying roof damage.
- Evaluate Ventilation: Check if vents and exhaust fans are clear of obstructions and functioning correctly to ensure proper ventilation.
By employing these inspection techniques, you will gain a comprehensive understanding of the state of your roof, allowing you to make informed decisions regarding repairs or replacement.
Estimating Materials Required
When it comes to replacing a roof, accurately estimating the materials required is crucial for a smooth and efficient process. This step involves carefully assessing the size and dimensions of your roof to determine the amount of roofing material, underlayment, flashing, and other necessary components. While it’s possible to hire a professional roofing contractor to handle this task, having a basic understanding of the estimation process can help you make informed decisions and ensure that you have all the materials needed.
The first step in estimating materials is to measure your roof’s surface area. This can be done by measuring the length and width of each individual section or slope of the roof. Take note of any architectural features, such as dormers or skylights, as they may require additional materials. Once you have these measurements, calculate the total square footage of your roof.
Next, consider the type of roofing material you plan to use. Different materials have varying coverage rates per square foot. For example, asphalt shingles typically cover around 100 square feet per bundle, while metal panels may cover more or less depending on their size.
It’s also important to account for waste factors during estimation. Waste factors include cuts made during installation and any necessary overage to accommodate for mistakes or future repairs. As a general rule of thumb, adding 10% – 15% to your total square footage can account for waste.
Once you have determined the square footage and waste factor, you can calculate the number of bundles or sheets needed for your roofing material. Divide the total square footage by the coverage rate per bundle or sheet to get an estimate of how many units are required. Keep in mind that it’s always better to round up when purchasing materials to ensure you have enough for the entire project.
Lastly, don’t forget about additional components such as underlayment, flashing, nails, and other accessories. These items are essential for proper installation and weatherproofing. Consult with your roofing material manufacturer or a professional contractor to determine the specific quantities required based on your roof’s characteristics and local building codes.
Pre-Roof Replacement Steps
Proper preparation is key to ensuring a successful and efficient roof replacement project. Taking the time to complete essential pre-roof replacement steps not only helps streamline the installation process but also addresses any potential issues that could arise during construction.
The first step is to conduct a thorough inspection of your existing roof. This involves identifying any signs of damage, leaks, or underlying issues that need attention before installing the new roof. It’s crucial to address these problems beforehand to prevent further damage or complications down the line.
Next, clear your attic space and cover any valuable items to protect them from dust and debris that may be dislodged during the roof replacement process. It’s also advisable to remove any wall decorations or fragile items near the roofline inside your home as a precautionary measure.
If necessary, make arrangements for parking or temporarily relocating vehicles away from the work area. This ensures that there is ample space for contractors and their equipment during the roof replacement process while minimizing the risk of accidental damage.
Notify neighbors about the upcoming construction work and explain that there might be some noise and disruption during the process. Maintaining open communication and addressing any concerns from neighbors can contribute to a smoother project timeline.
Finally, ensure that you have the necessary permits and permissions required by local building codes or homeowner’s associations before commencing with the roof replacement. Compliance with these regulations is essential to avoid potential legal issues and ensure that the new roof meets safety standards.
By completing these pre-roof replacement steps, you can lay the foundation for a successful and stress-free project. The thorough inspection, preparation of interior spaces, arrangements for parking, neighbor notifications, and obtaining permits are all crucial elements that contribute to a smooth transition into the roof replacement process.
Preparation and Waste Management
Before the actual roof replacement process begins, thorough preparation is necessary to ensure a smooth and efficient operation. This includes several crucial steps such as obtaining permits, protecting the surrounding areas, and effectively managing waste generated during the project.
Firstly, it is essential to obtain any necessary permits or approvals required by local building codes or homeowners’ associations. These regulations vary depending on your location, so it’s important to check with the relevant authorities beforehand. Proper documentation ensures that the roof replacement project complies with all legal requirements and avoids any potential issues in the future.
For instance, if you live in a neighborhood with strict homeowners’ association guidelines, you may need to submit architectural plans or color samples for approval before proceeding with the roof replacement.
Once permits are secured, it’s time to focus on protecting your property and minimizing any potential damage during the roofing process. Roofing materials, tools, and debris can be hazardous if not managed properly. To prevent accidents and protect your home and belongings, experienced roofing contractors take precautions such as:
- Erecting safety barriers and caution tape around the work area to restrict access
- Covering plants and landscaping near the work zone to shield them from falling debris or damage
- Using plywood or tarps to protect windows and other vulnerable areas of your property
Additionally, professional roofing teams often utilize large dumpsters or waste containers strategically placed near the worksite for efficient waste management throughout the project. These containers are typically equipped with measures to prevent littering or shifting of debris, ensuring a clean and safe environment during the roof replacement process.
Waste management is a critical aspect of any construction project, including roof replacements. Responsible contractors will remove and dispose of old roofing materials in an environmentally friendly manner. Recycling options for materials such as asphalt shingles, metal, or wood can be explored to reduce waste sent to landfills.
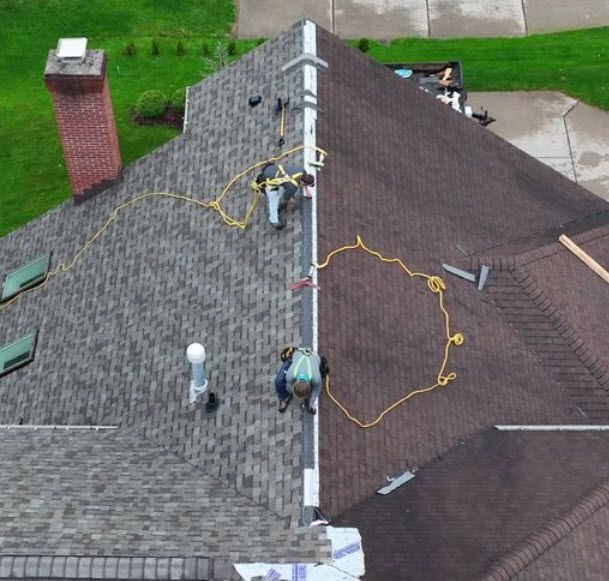
The Roof Replacement Process
The roof replacement process is an intricate undertaking that requires careful planning and execution. While each project may vary based on factors like the size of the roof, the type of materials being used, and weather conditions, there are general steps involved that can help guide you through the process.
- Inspection and assessment : A professional roofing contractor will conduct a thorough inspection of your existing roof to assess its condition and identify any underlying issues or structural damage. This step helps determine if a complete replacement is needed or if repairs are sufficient.
- Material selection : Once it is determined that a roof replacement is necessary, you will work with your roofing contractor to choose the appropriate materials for your new roof. Consider factors such as durability, energy efficiency, aesthetic appeal, and budget when making this decision.
- Preparation : Before installation begins, the existing roofing materials must be removed. This involves stripping away the old shingles or other coverings down to the bare surface of the roof deck. Any damaged or deteriorated decking will also be identified and replaced at this stage.
- Installation : With the preparation complete, the installation of the new roofing system can begin. This includes installing underlayment, flashing, starter strips, shingles or other chosen material, ridge vents, and any additional components specific to your roofing design.
- Cleanup and final touches : Once the new roof is installed, a thorough cleanup is conducted to remove any debris or leftover materials from the work area. Some contractors may also perform a final inspection to ensure everything meets quality standards and address any remaining concerns.
Remember that weather conditions can impact the timeline of the roof replacement process. If there are extended periods of rain, extreme temperatures, or other unfavorable conditions, it may cause delays in completing the project.
Frame Construction
Before the installation of insulation and shingles can begin, it is crucial to ensure a solid and secure foundation for the new roof. This is where the frame construction comes into play. The frame construction involves assessing and reinforcing the structural integrity of the roof’s framework.
In cases where there is significant damage or decay to the existing frame, repairs or replacements may be necessary before proceeding with the roof replacement. This step is essential as it lays the groundwork for a successful and durable roof installation.
A professional roofing contractor will thoroughly inspect the frame, looking for signs of rot, water damage, or any other structural issues that could compromise the new roof’s stability. They will assess the quality of existing materials used in the frame and determine if any reinforcements or replacements are required.
For instance, if the original frame was built using outdated or inadequate materials, such as weak plywood or substandard trusses, it may be necessary to replace them with more durable options like engineered wood or steel. These enhancements ensure that the new roof can withstand various weather conditions and last for years to come.
Once any necessary repairs or replacements have been completed, modifications and reinforcements can be made to accommodate additional weight from insulation and roofing materials. This includes adding support beams or columns as needed to ensure proper load distribution throughout the structure.
With a sturdy frame in place, attention can now turn towards insulating the roof and installing shingles – vital components that contribute to energy efficiency, protection against elements, and overall longevity of your new roofing system.
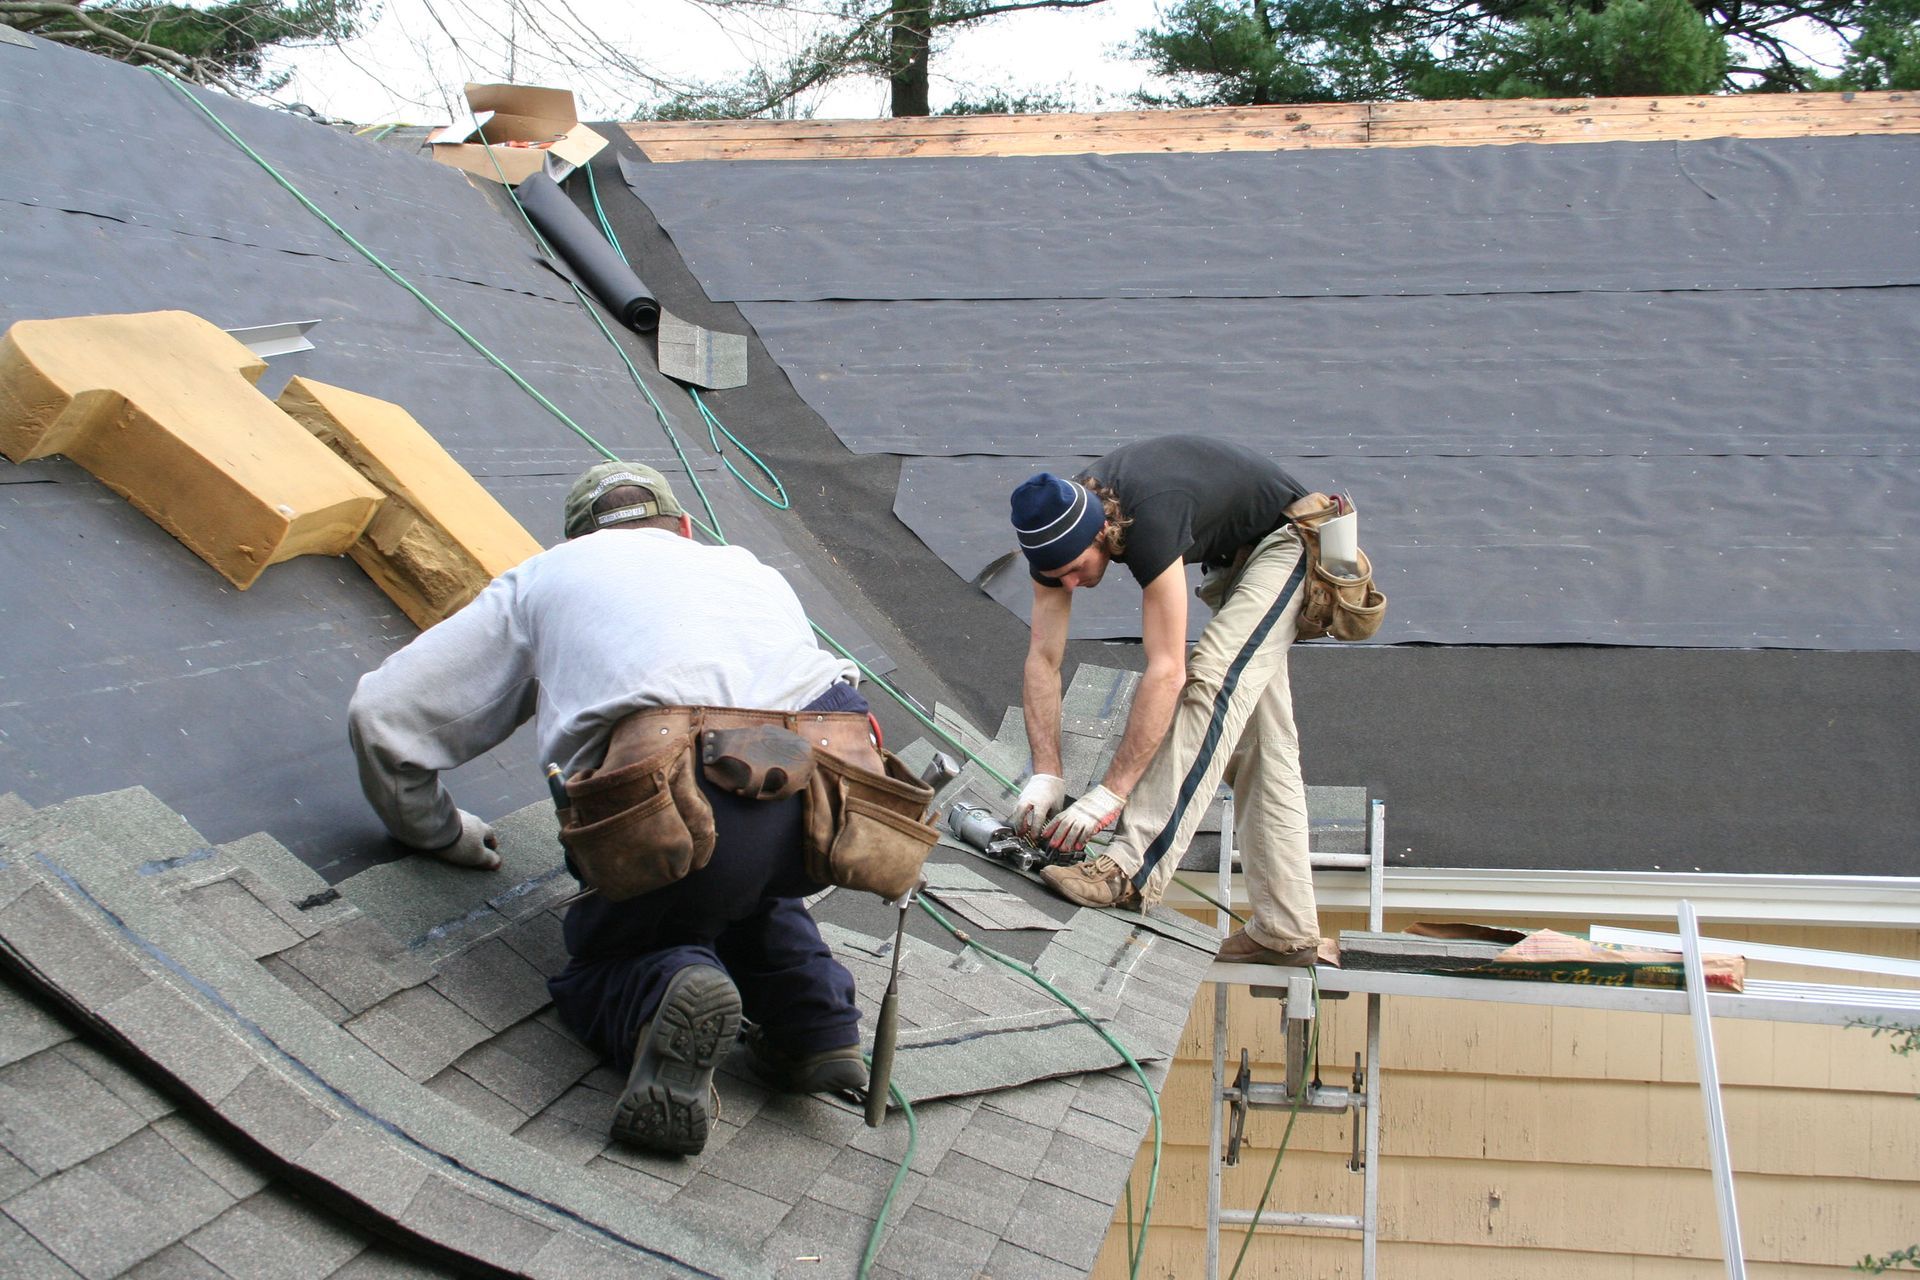
Insulation and Shingles Installation
Insulation plays a crucial role in maintaining a comfortable environment within your home while also helping to reduce energy costs. During a roof replacement project, insulation is typically installed before shingles are placed on top.
The process begins with removing any old insulation from the attic space. This allows for a fresh start and ensures that new insulation is properly installed without any compromises. The type and thickness of the insulation will depend on factors such as climate, local building codes, and personal preferences.
Once the insulation is installed, the shingles can be placed on top. The shingle installation process involves carefully aligning and securing each individual shingle using nails or adhesives. This step requires precision to ensure proper water drainage and overall aesthetics.
Roofers will start at the bottom edge of the roof and work their way up, overlapping each row of shingles to create a watertight barrier. They may also need to cut shingles to fit around corners, vents, or other protrusions on the roof’s surface. This attention to detail ensures a seamless and visually pleasing finished product.
Throughout the installation process, roofing professionals maintain strict adherence to manufacturer guidelines and industry best practices. This ensures that the roof meets all necessary quality standards and provides reliable protection for your home.
With insulation in place and shingles securely installed, we move into the final stage of a roof replacement project – finalizing and putting the finishing touches on the new roof.
Finalizing the Roof Replacement
Once the actual process of replacing a roof is complete, there are still a few important steps to take to ensure that everything is finalized properly. The finalization phase involves various tasks that will help guarantee the long-term durability and functionality of your new roof.
Firstly, it is crucial to conduct a thorough inspection of the completed roof replacement. This inspection should be performed by both you as the homeowner and the roofing contractor. It involves examining every aspect of the new roof, checking for any signs of damage, missing or loose shingles, improper installation, or other issues that may need attention. Taking note of any concerns during this inspection ensures that they can be addressed promptly.
Once the inspection is complete, it’s time to review and obtain all necessary documentation related to your roof replacement project. This includes warranties provided by the roofing materials manufacturer and any additional warranties offered by the roofing contractor. These warranties are essential as they provide you with assurance regarding the quality and longevity of your new roof. Make sure to carefully read through all terms and conditions outlined in these documents to fully understand what is covered and for how long.
Another important step in finalizing a roof replacement is securing all necessary permits and approvals required by local building codes or homeowner’s associations. Ensuring that all legal and regulatory requirements are met helps protect you from any potential issues in the future. If your roofing contractor handled obtaining permits on your behalf, it’s still advisable to verify this information independently.
Ensuring Quality Workmanship
Ensuring that your roof replacement is carried out with exceptional workmanship plays a vital role in its overall performance and longevity. Here are some key factors to consider when evaluating the quality of workmanship:
1. Skilled Roofing Contractor: Hiring a reputable and experienced roofing contractor is crucial to ensure quality workmanship. Look for contractors with a proven track record, positive reviews, and certifications from roofing material manufacturers. A skilled contractor will have the expertise and knowledge to execute the roof replacement properly.
2. Proper Installation Techniques: Quality workmanship involves following proper installation techniques for different roofing materials. From correctly aligning shingles and flashing to using appropriate fasteners, each step must be executed meticulously to achieve a reliable and durable roof.
3. Attention to Detail: A hallmark of excellent workmanship is attention to detail. This includes ensuring that all components of the roof, such as vents and gutters, are properly installed and integrated into the overall system. Even small details like straight, aligned shingle rows can make a significant difference in both aesthetics and functionality.
4. Use of Quality Materials: High-quality roofing materials are essential for long-lasting performance. A reputable contractor will use materials from trusted manufacturers known for their durability and reliability. Ask your contractor about the specific brands and types of materials they plan to use during the replacement process.
Imagine a scenario where a homeowner chooses a contractor based solely on low prices without considering their experience or reputation. The result may be poor workmanship, leading to premature roof failures and additional expenses down the line.
By prioritizing quality workmanship during your roof replacement project, you can have peace of mind knowing that your investment will provide reliable protection for your home for years to come.
The post How Long Does It Take to Replace a Roof? appeared first on Ireland Contracting.

Share On: